JBaz
All American
16764 Posts
user info
edit post |
nice job guys! keep up the good handy work, lets keep this page filled.
FYI, I just finished up my first LED flood lamp proof of concept prototype today with off the shelf leds. 9x9x3" 420 LED's, ~3000 lumens and barely uses 40w. I'm out in Arizona right now and brought all of my tools, leds and materials with me on the plane(mostly checked in luggage); you could say it was an "interesting" TSA conversation and explain the projects.  9/3/2013 2:39:40 AM 9/3/2013 2:39:40 AM
|
mdozer73
All American
8005 Posts
user info
edit post |
Desk for my son's room:
Before:

After:
 9/3/2013 9:41:26 AM |
disco_stu
All American
7436 Posts
user info
edit post |
Nice work. 9/3/2013 10:15:59 AM |
MaximaDrvr
10379 Posts
user info
edit post |
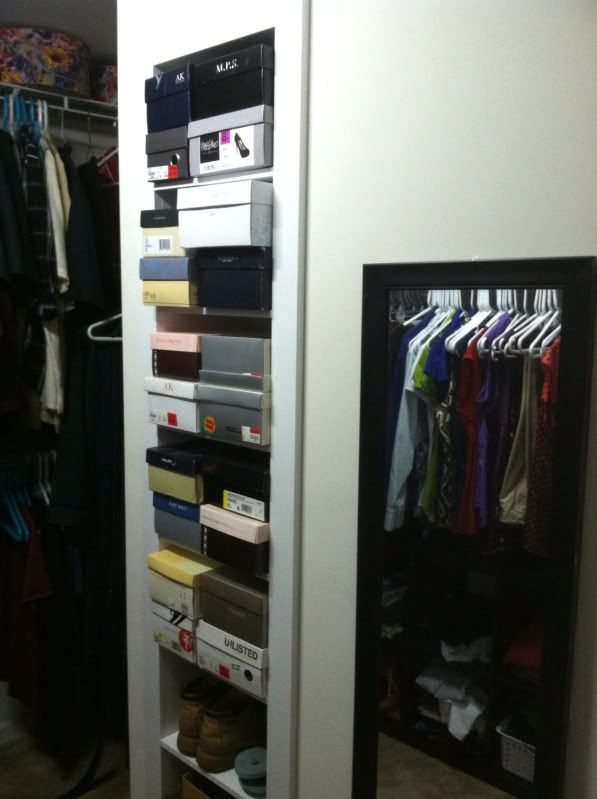
And now it is full of her shoes.
"But there isn't any more room. Where am I supposed to put new pairs?"
  
 9/3/2013 4:58:25 PM |
puck_it
All American
15446 Posts
user info
edit post |
There's a spot where your boots are. They will be going. 9/3/2013 6:09:33 PM |
puck_it
All American
15446 Posts
user info
edit post |
I clicked on page 1 by accident... And called to arms posted his little nook shelf thing waaaay back when.
| Quote : | "
Just to give a better idea, this is the tv nook I was talking about earlier. Still considering installing some shelves in there and installing some accent lighting on the backside of that front arch. That wall is going to be painted sort of a flat wine-red color and I think I will paint the inside of that nook a differ shade of that or a different color and paint the shelves a semi-gloss white like the fireplace.
4/11/2010 10:07:58 PM" |
Glad you got it done ! 9/3/2013 6:14:21 PM |
MaximaDrvr
10379 Posts
user info
edit post |
^^Those are her boots and sandals. My boots live in the garage. 9/3/2013 6:17:38 PM |
puck_it
All American
15446 Posts
user info
edit post |
9/3/2013 6:32:34 PM |
CalledToArms
All American
22025 Posts
user info
edit post |
^^^ haha yeah. I'm really bad with that. We have so many projects all the time and once I get a project "serviceable" or far enough along, I get sucked into some other project leaving the other one at 90%. Here I got the shelves in, painted the sides and shelves white and didn't feel like messing with the foam-board and picking out a wallpaper, so we just painted the back of it and then never picked out a wallpaper until 2 weeks ago 
[Edited on September 3, 2013 at 7:07 PM. Reason : ] 9/3/2013 7:06:12 PM |
puck_it
All American
15446 Posts
user info
edit post |
Yeah, I imagine there were more pressing projects. I was just on page one and was like... I know that alcove. 9/3/2013 7:45:50 PM |
CalledToArms
All American
22025 Posts
user info
edit post |
I actually did that this weekend too when I wrote up my post haha. I clicked on the 1st page of the thread by accident instead of going to the newest post. Then I looked at the date I am very glad we got around to the wallpaper though. The red paint on the back made it so dark because it is deeper than a normal bookshelf. The wallpaper made that whole area look 10x brighter and nicer - it really made the entire living room look brighter (in person).
Still considering another color other than red though as well on the wall itself (we're always changing something - house projects are just our thing together apparently).
[Edited on September 3, 2013 at 8:18 PM. Reason : ] 9/3/2013 8:06:25 PM |
puck_it
All American
15446 Posts
user info
edit post |
I wasnt huge on the wall paper, but painting it plain white doesn't work, nor does red. I think it was a smart choice 9/3/2013 8:33:37 PM |
Jaybee1200
Suspended
56200 Posts
user info
edit post |
nothing major, and still have a couple of wires to hide, but installed a 55 inch LG and sound bar tonight. REALLY impressed with the sound bar, great sound, wireless, wireless sub under the couch.

ignore the speaker on the floor, thats from the old system
[Edited on September 19, 2013 at 9:28 PM. Reason : d] 9/19/2013 9:27:44 PM |
Drovkin
All American
8438 Posts
user info
edit post |
I've started doing some woodworking projects and have a tool question.
I have a 12" Craftsman bandsaw (really old, was my grandfather's) that for some reason every time I try to cut something it burns the crap out of the wood.
I thought I just needed a new blade since the blades were so old, but after installing and triple checking all of the guides it still burns. It is a single speed belt driven bandsaw, and I've tried different feed rates for the wood with no luck. I'm using a 1/4" blade with 10 TPI Olsen brand, attempting to cut a 1.5" oak board.
Any ideas? 10/4/2013 9:28:52 AM |
spydyrwyr
All American
3021 Posts
user info
edit post |
I'm not trying to be condescending, it's an honest mistake I've seen made before, but do you have the blade oriented correctly (tooth direction)? 10/4/2013 11:38:47 AM |
Drovkin
All American
8438 Posts
user info
edit post |
Yep, teeth down.
I started thinking more about it and I wonder if I should have gotten less TPI.
With a 1.5" board, I've got 15 teeth in the wood. I've read that you usually only want around 6-8 teeth to ensure a proper cut. More teeth means smoother, but it may also mean more wood gets trapped during the cut and heats up.
Either way, since I rarely cut anything this thick I'm just going to power through and sand off the burn marks. Don't really want to go buy another blade at this point. 10/4/2013 12:17:45 PM |
jcgolden
Suspended
1394 Posts
user info
edit post |
i might make an aeroshell recumbant bike. the tricky thing is, it wont be in my Florida workshop, it will be in my downtown Shanghai appartment where i have like zero tools or equipment. it will have to be a masterwork of outsourcing, ordering, and translation.
maybe i make a internet documentary about it? any interest out there? 10/4/2013 2:09:17 PM |
slaptit
All American
2991 Posts
user info
edit post |
^^Have you properly set the blade tension and guide blocks? 10/4/2013 8:31:13 PM |
puck_it
All American
15446 Posts
user info
edit post |
^^^ yeah, I was going to ask if you were using the right blade for the application. 10/4/2013 9:24:35 PM |
Wolfmarsh
What?
5975 Posts
user info
edit post |
You need something more like a 4 or 6 TPI, imo. 10/5/2013 3:52:12 PM |
Wolfmarsh
What?
5975 Posts
user info
edit post |
Also, make sure you aren't pinching the band with the way you are holding/moving the wood through. 10/5/2013 5:16:19 PM |
Kiwi
All American
38546 Posts
user info
edit post |
We just finished turning a waste of space into a screen room. Wrong time of year but glad we got it done now!
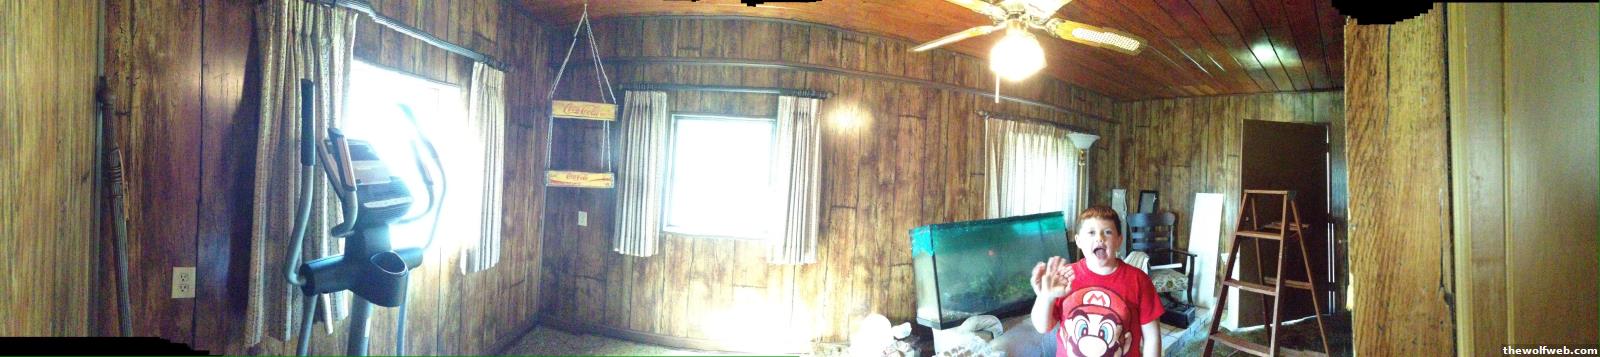
Before
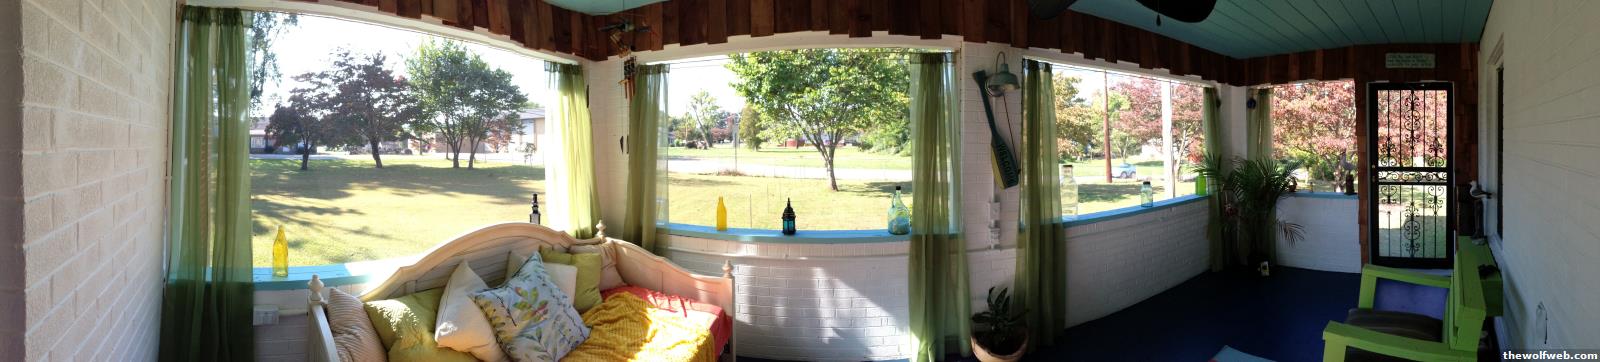
After
[Edited on October 5, 2013 at 6:14 PM. Reason : Hdhdh] 10/5/2013 6:13:49 PM |
CalledToArms
All American
22025 Posts
user info
edit post |
looks good  10/5/2013 6:20:20 PM |
A
All American
1428 Posts
user info
edit post |
is the awkward kid in the picture the one who you awkwardly try to parent even though you are just a step-momgirlfriend? 10/6/2013 12:04:03 AM |
Kiwi
All American
38546 Posts
user info
edit post |

Thanks, calledtoarms.
10/6/2013 10:36:12 AM |
goalielax
All American
11252 Posts
user info
edit post |
that's a nice clean wall hang there jaybee - well done. 10/6/2013 10:53:10 AM |
CalledToArms
All American
22025 Posts
user info
edit post |
yep, cleaning up the wires is definitely the way to go - we are doing just that this weekend in our bonus room. We've considered a sound bar as well. Which one did you get Jaybee?
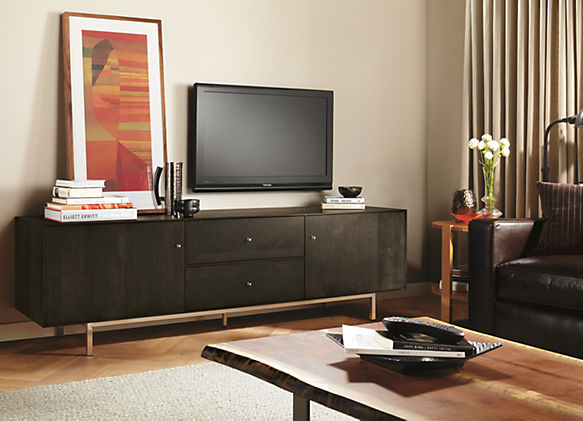
As stated, we are in the middle of re-painting the bonus room a warm grey color as well as doing a bunch of other stuff to it (basically redoing the entire room). This is a quick snapshot of the TV being mounted over the new-to-us vintage buffet we are using as our media console. Picture is from yesterday after the paint dried on that wall:

The perspective is off in the picture due to where I took it from, but the edge of the TV aligns with the edge of the cabinet. It is off-center for a reason due to the way we have the rest of the room and seating set up. As we finish the room, we will be adding art and some shelving on this wall that will balance it and make it obvious that the off-center positioning was intentional. Wish I was ready show off the rest of the room, but we have awhile before we get our sofa and chair reupholstered , get art printed and framed, and finish painting etc.
Also, I wish I had time to really learn woodworking; that buffet is some damn fine craftsmanship. Solid Walnut, with a lot of subtle detailing you can't see in the picture. We got it second-hand for a steal.
[Edited on October 6, 2013 at 11:57 AM. Reason : ] 10/6/2013 11:49:02 AM |
A
All American
1428 Posts
user info
edit post |
i'm curious as to how you are going to balance that out... i see you put it off center on purpose, but wouldn't it be better to center it and build out symmetrically? (of course that's just a matter of personal taste.) 10/6/2013 3:47:46 PM |
CalledToArms
All American
22025 Posts
user info
edit post |
it will be tougher in this situation than others I've done because the wall space (with doors on either side turned 90 degrees to each other that you can't see in the picture) didn't lend itself to a longer media cabinet. I really love when someone pulls off a modern asymmetrical look with media centers, but it comes across much better with a cabinet:TV ratio that is larger than ours is.
For example:
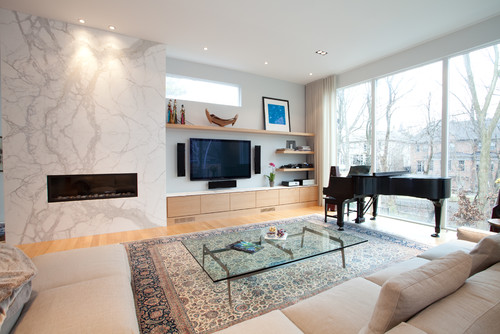
But, this is in our bonus room, and the main seating is a sectional tucked into the back corner of our room (the side the TV is on) and the TV is just about perfectly centered on the bulk of the sectional setting. Additionally, it's one heavy plasma TV and the way the studs are lined up on this wall combined with the position of the bracket arms on the back of this TV, we basically had a 16" swing to one side or the other of being centered on this wall with very little wiggle room. And in either spot, we didn't have room to center the cabinet under the TV. So, I mounted the TV in the most favorable viewing spot and I'm just going to embrace the off-center look.
Because our cabinet:TV ratio is smaller, I will end up doing something more like this:

But also, like I said, I tend to enjoy the asymmetrical nature unless you have a setup that really needs the symmetry.
[Edited on October 6, 2013 at 5:15 PM. Reason : ] 10/6/2013 5:12:04 PM |
NeuseRvrRat
hello Mr. NSA!
35376 Posts
user info
edit post |
how did you hide the wires? just cut in a box behind the tv and another directly below and fish the wires? 10/6/2013 8:13:12 PM |
CalledToArms
All American
22025 Posts
user info
edit post |
Yep. Nothing too fancy. Just used a boring attachment on my drill and cut a hole right behind where the wires come out on the back of the TV and cut another one behind the stand. I also had to cut a hole in the back of the cabinet and in the back of the drawer we placed the items in. There is also a receptacle right behind the cabinet so I ran a power strip into the same drawer.
I do plan to come back and cut a few more holes in the back of the cabinet for ventilation but it hasn't seemed warm in there so far at all. We just have a blu-ray player and a roku though.
[Edited on October 6, 2013 at 8:25 PM. Reason : ] 10/6/2013 8:24:45 PM |
Jaybee1200
Suspended
56200 Posts
user info
edit post |
I actually installed an outlet right behind the tv on the wall for power. The soundbar is bluetooth enabled so the only wire running from it is the power. Originally, with my old tv, I did have to run wires to the receiver/speakers so I went through the wall, removed the baseboard to fish it over to the receiver and then replace the baseboard.
I got the LG Electronics NB3530A Sound Bar System, but it was thrown in with my tv in a kickass special Amazon was running. The tv is REALLY damn good but I think the soundbar is more impressive. Great sound, and it also has a wireless sub that I put under the couch. 10/7/2013 2:58:53 PM |
CalledToArms
All American
22025 Posts
user info
edit post |
thanks for the info man. I've looked at that one before and it looks like the price has come down some on them too. Glad to hear you like it; I might seriously consider one for that bonus room TV. 10/7/2013 3:05:23 PM |
jbrick83
All American
23447 Posts
user info
edit post |
We're about to hang something on our old brick fireplace and I wanted to get some advice.
To you drill a hole in the brick or the mortar? I've seen both recommendations online. Do you use brick clamps or nails?
The brick is pretty old, so I definitely worried about cracking. 10/8/2013 8:57:01 AM |
Wolfmarsh
What?
5975 Posts
user info
edit post |
How heavy is what you are trying to hang? 10/8/2013 9:33:14 AM |
spydyrwyr
All American
3021 Posts
user info
edit post |
I'd agree that it depends on the weight of what you're hanging. I've had good luck in the past with masonry nails and pre-drilling. I've done it in the mortar and the brick itself with success.
I'd also recommend angling the nail as opposed to keeping it normal to the wall surface. 10/8/2013 9:52:38 AM |
wdprice3
BinaryBuffonary
45908 Posts
user info
edit post |
I'd normally say avoid the mortar and go through brick. But if it's really old and very brittle, then maybe not. Though, I doubt it's old enough to be that bad, especially with interior brick. 10/8/2013 9:57:51 AM |
jbrick83
All American
23447 Posts
user info
edit post |
Weight is listed at 14 lbs...so not exactly a light picture frame.
Hardware store guy this morning recommended going through the mortar since I'm dealing with old brick. 10/8/2013 10:24:01 AM |
wdprice3
BinaryBuffonary
45908 Posts
user info
edit post |
fair enough. have you inspected the mortar very well? I mean all over the place? The biggest problem with mortar is not getting/losing contact with the brick. It's quite common and is a problem with older work, where it will fall out/can be pulled out with no effort. I'd be very hesitant to go through the mortar if you start finding weak spots (even if not close to where you are hanging something - could be a sign of workmanship/mortar quality/etc.).
14 lb isn't that much for brick & mortar. I've seen flat panel TVs mounted on brick chimneys. 10/8/2013 10:34:39 AM |
jbrick83
All American
23447 Posts
user info
edit post |
Is it fairly easy to inspect the mortar? Just tap around with a nail and hammer and see if it chips/crumbles? 10/8/2013 10:45:48 AM |
CalledToArms
All American
22025 Posts
user info
edit post |
I don't know about testing it, but I would definitely go through the Mortar instead of the brick. Mortar can always be repaired and replaced as well, but replacing old brick would be more annoying. I've seen people drilling and anchoring into the mortar much more often than the brick itself. 10/8/2013 11:45:00 AM |
wdprice3
BinaryBuffonary
45908 Posts
user info
edit post |
^I agree that you see it often, probably because it is easier and safer from an installation stand point. However, my experience in seeing installations on masonry comes from professionals - government/industrial/commercial applications. Look around places like that and I doubt you'll see something installed in the mortar. 10/8/2013 12:26:35 PM |
jbrick83
All American
23447 Posts
user info
edit post |
| Quote : | "Is it fairly easy to inspect the mortar? Just tap around with a nail and hammer and see if it chips/crumbles?
" |
10/8/2013 12:57:14 PM |
wdprice3
BinaryBuffonary
45908 Posts
user info
edit post |
haha, sorry.
Pretty much. Don't even need a hammer. Just look for cracking/loose pieces. Use a nail/finger to poke around for any movement/crumbling.
CTA is correct that mortar is stronger/less brittle. But again the issue is if the mortar is and will remain in place/in contact.
[Edited on October 8, 2013 at 1:02 PM. Reason : g] 10/8/2013 1:02:03 PM |
CalledToArms
All American
22025 Posts
user info
edit post |
I think as part of our kitchen remodel, I am going to change up the seating in the breakfast area. This is an older picture of our breakfast area from last year after we had already done a few things to it:

That setup looks decent but it isn't a very efficient use of the space (can only seat 2 there comfortably) so I'd like to try a different setup. I looked for a picture tonight to mimic what I have in mind and this is actually pretty darn close:

Because of the dimensions of the breakfast nook in our house (not very large) and the fact that it is tucked next to our sliding door to our deck, I'm limited on the dimensions so I've been planning to DIY something so I have complete control over the dimensions. Also, since we have medium wood floors as well as kitchen cabinets, I want to avoid using a wood top. Unfortunately, that would be the easiest to DIY.
My first thought was to get the top made out of the same quartz that we will use for our counters once we finalize that choice. I still think that is my long term plan since I think it will really cap off the kitchen area and look really pulled together. To go along with that, I think I'm going to get someone to make me some trapezoidal metal legs with flanges like this:
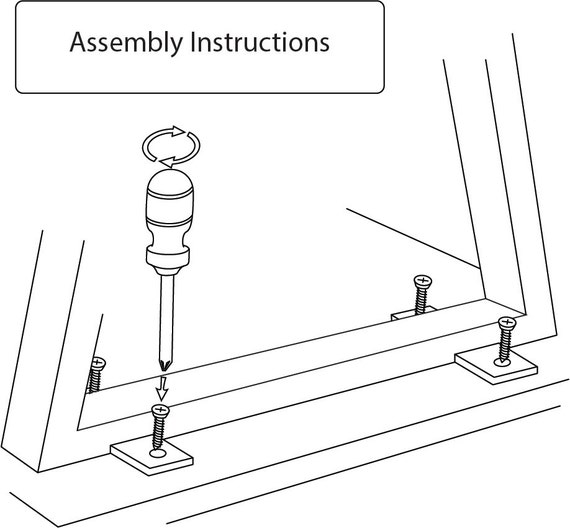
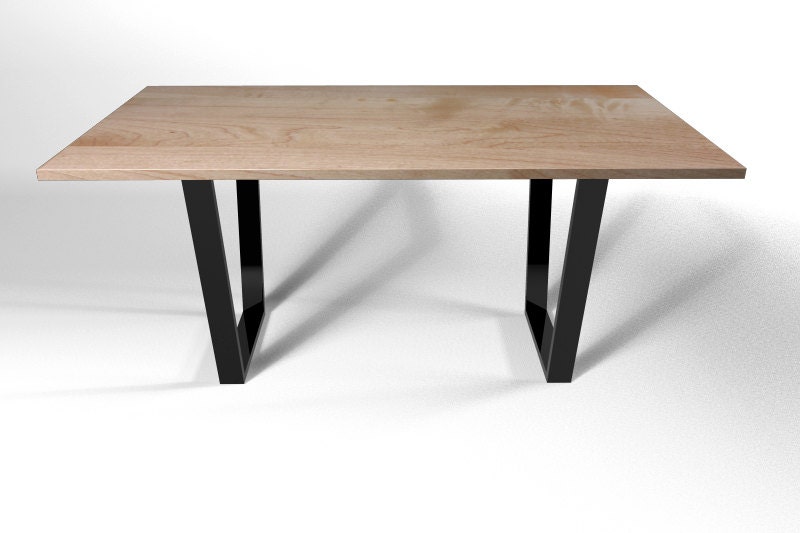
Tonight I think I found a perfect temporary solution to try to see if we even like that setup. I'd still plan to pay someone to make the same legs either way, but IKEA offers some high gloss acrylic painted MDF 1 3/8" table tops for super cheap ($26) in nearly the exact same dimensions I was planning on using

We could always come back later and swap out for the quartz top easily. With the MDF top I think it could be built for <$400.
We will also have seating on the back of our peninsula but this will provide a little extra seating for coffee or something.
[Edited on October 10, 2013 at 10:38 PM. Reason : ] 10/10/2013 10:14:38 PM |
jbrick83
All American
23447 Posts
user info
edit post |
For some reason I don't think that booth will look right if it isn't flank on both sides by something. From the look of that, one side of the booth will be open-ended. The picture of the booth you posted makes it look like a cozy little breakfast nook. Without those drawers (or whatever else you would put there) on one side, I just think it might possibly look odd.
Just my opinion. 10/11/2013 11:41:44 AM |
CalledToArms
All American
22025 Posts
user info
edit post |
no, you're definitely right. I didn't address that in my post. We initially thought of doing built-in / banquette type seating but decided against it for a few reasons, with that being one of them.
Instead, I think we simply plan to use a bench back there.
Possibly something simple we make like this:
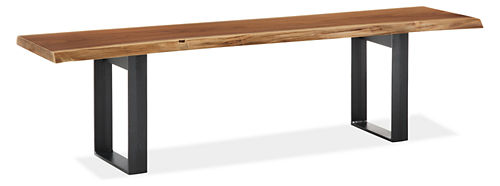
or lots of places obviously sell dining benches in various lengths that we could get with upholstered tops and stuff.
I think it actually works out better that way because I plan to half-tile that wall in the breakfast area anyway, and a minimal bench will let that show through instead of covering it up. Hard to describe without a picture in front of me, but basically, where we have the backsplash tile covering the 18" between the counter and the cabinets, I am going to continue that top line at the bottom of the cabinets across the wall over into the breakfast area until it hits the back wall with the sliding glass door + curtains. This is instead of having the tile just stop at the edge of the cabinets. So, the area behind the table would be tiled from 54" down to the ground. I would do all the way to the ceiling, but it would be a little too pricey.
[Edited on October 11, 2013 at 12:18 PM. Reason : ] 10/11/2013 11:56:15 AM |
raiden
All American
10504 Posts
user info
edit post |
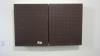
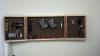
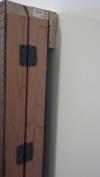
totally stole the idea from another poster up in this thread, but this was my first project in the new house and I'm pretty happy with it. HOLLA!!
[Edited on October 20, 2013 at 9:03 AM. Reason : image tags. ] 10/20/2013 9:03:05 AM |
raiden
All American
10504 Posts
user info
edit post |
the idea was stolen from spydyrwyr
and its awesome.
[Edited on October 20, 2013 at 3:35 PM. Reason : yo give credit where its due homie. ] 10/20/2013 3:34:53 PM |
BobbyDigital
Thots and Prayers
41777 Posts
user info
edit post |
This a semi-DIY. We hired out some of the painting, and the carpentry work.
10/23/2013 1:32:39 PM |